
Last month I wrote about how I improved our Jenkins implementation by adding a testing process and using Build Flow to parallelize our content tests. It was a successful project but Jenkins development occurs rapidly. It wasn’t long before Build Flow was deprecated in favor of Jenkins’ native Pipeline system.
Another problem with our implementation was that the processes were set up as a sequence of jobs where each successful job would trigger the next one. This made it hard to reason about the logical flow of the process unless you were familiar with the build or had external documentation. Most of jobs needed their own workspaces which resulted in code and file duplication on the Jenkins server.
The build process configuration was spread across code in the repo, settings in the target websites, and in the job configuration. We created tools to help us export the Jenkins job configuration XML to our repo but it could be made better.
Finally, switching to the Pipeline system would make the entire process more resilient to restarts. This would be a big win as our build is very long running so there’s a lot of opportunity for unexpected restarts.
We decided that moving to an entirely Pipeline-based work flow would be a good next step for our implementation.
Groovy
The main task of the project was to create a Jenkinsfile that would capture our entire build in a single file.
Node
We have a single Jenkins server configured with 4 executors (one per core). We started with a single node for our job:
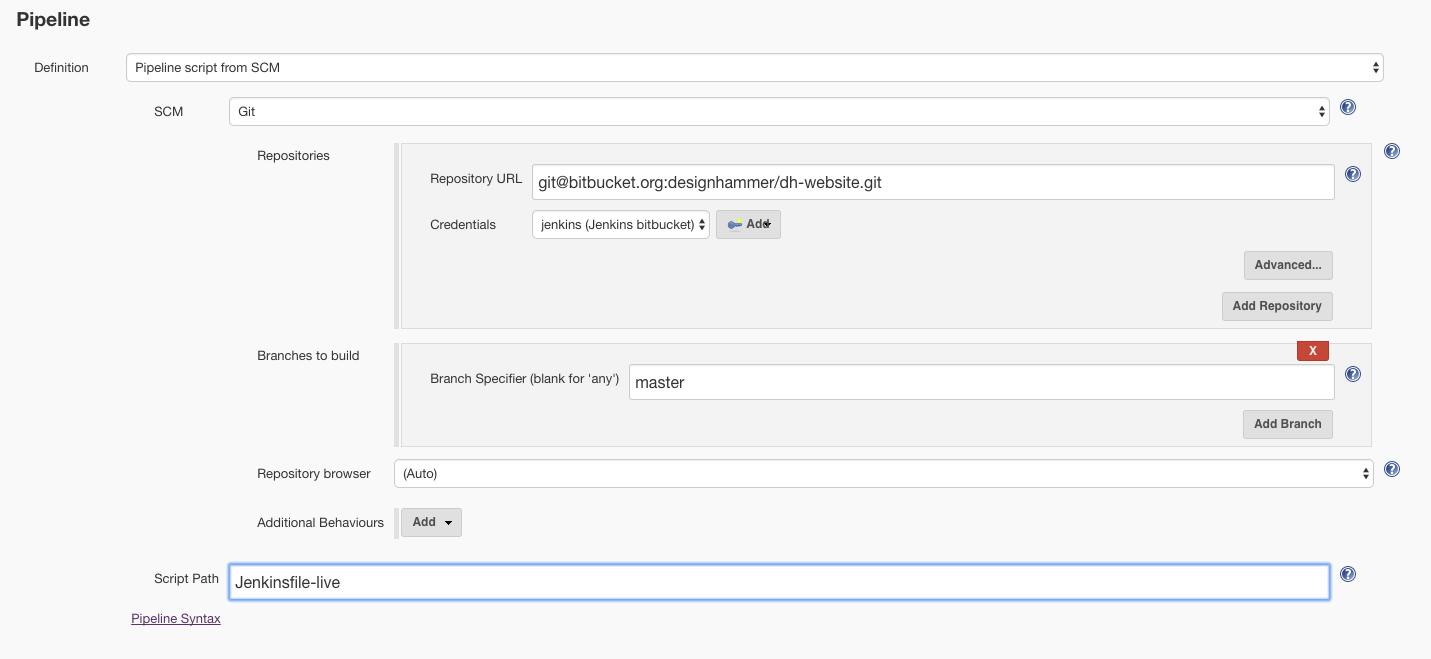
The build process is primarily handled as a series of shell invocations to scripts and tools contained in the project’s repo. The next step was to pull a copy of the repo into the job’s workspace. Note that the git access we set up in the Pipeline configuration above is for Jenkins to get the Jenkinsfile. This Jenkinsfile is pulled into a folder which is a sibling of the normal workspace folder. We add an additional step here to pull a copy into the main workspace folder.
Stages
I then added stages that mapped closely to the conceptual phases of the process.
With this structure in place I started building out each of the jobs by copying the shell invocations from the original Jenkins jobs into sh steps in the Groovy pipeline.
The great part about this was that I had to do very little to the shell invocations themselves. It was pretty much just copy-and-paste with some minor path adjustments.
Parallel
For the Content Test stage it was simple to run the casperjs tests in parallel with the parallel step.
I ran into an issue at this point where the path for phantomjs (a component used by CasperJS) was not being expanded properly. This was causing the whole PATH environment variable for the entire server to be overwritten, breaking all of the builds. I took the opportunity to move the PATH definition out of the global Jenkins config and into our new Jenkinsfile.
I did this with the withEnv step which allows you to define environment variables within a specific scope. withEnv provides a special syntax for prepending values to an environment variable:
This:
/my/additional/path:$PATH
is expressed as:
PATH+ANYSTRING=/my/additional/path.
I added this to the content test block:
I built out the rest of the stages in a similar fashion.
Notifications
At this point the pipeline was fully runnable. However, it lacked the notification functionality of the previous job setup. Fortunately, there is solid support for a variety of notification methods and because it’s all written in Groovy you have far more control of the exact behavior of the notifications.
We use HipChat and email for sending notifications. I adapted this approach for pipeline notifications. I wanted to include the full details (with markup) in our HipChat notifications. In order to get the markup to render properly you need to ensure that you pass textFormat: false to hipchatSend():
With two pipeline scrips (Jenkinsfile-live and Jenkinsfile-testing) I didn’t want to duplicate the notification code so I needed to include it as a shared library.
To do this I pulled that code out into a separate file in the main repo called JenkinsTools.groovy. That file contains the definition for the notifyBuild() function and returns it:
Then, at the top of each Jenkinsfile I load it with:
def jenkinsTools = load 'resources/jenkins/JenkinsTools.groovy'
And call it with:
jenkinsTools.notifyBuild(currentBuild.result)
Shell color output
To top things off I wanted to restore the nice console output colors we had in our previous setup. This was easy to achieve with the AnsiColor Plugin. I wrapped the entire inner block with the build wrapper:
Conclusion
We were able to reduce our Jenkins job configuration from 30 interrelated freestyle and Build Flow jobs down to two Pipeline jobs which each capture the entire build process.
This update has helped to future-proof our implementation and has prepared us for an update to the back-end service which provides content for the build. We will be running this setup in production for a while so it is great to have it in such a stable and maintainable format.